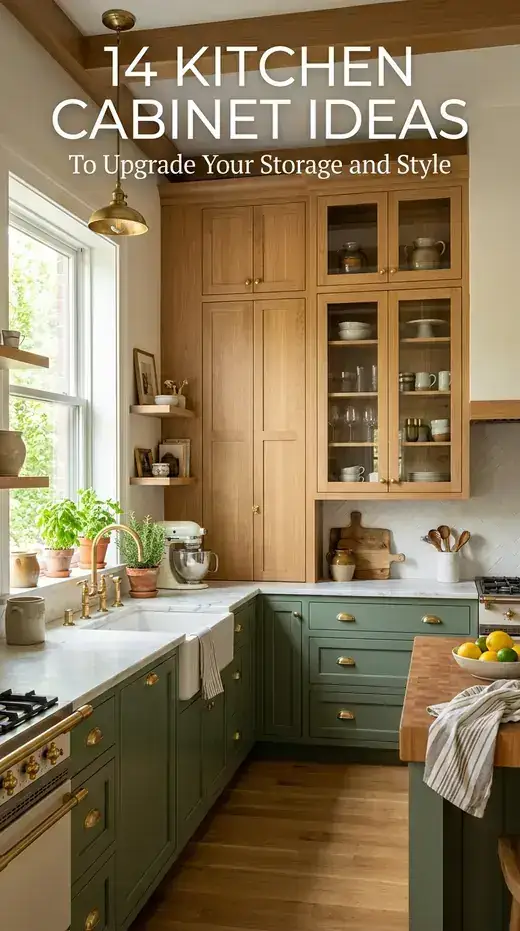
Your cabinets take up more visual space than anything else in your kitchen, and they also determine how easy it is to cook every day. When cabinets stop short of the ceiling or hide dark, cluttered shelves, the whole room can feel frustrating to use.
Below, you will find 14 practical kitchen cabinet ideas that combine warm style with hardworking storage. Whether you are planning a full remodel or updating existing doors over the weekend, these tips will help your kitchen work better.
1. Take Upper Cabinets All the Way to the Ceiling
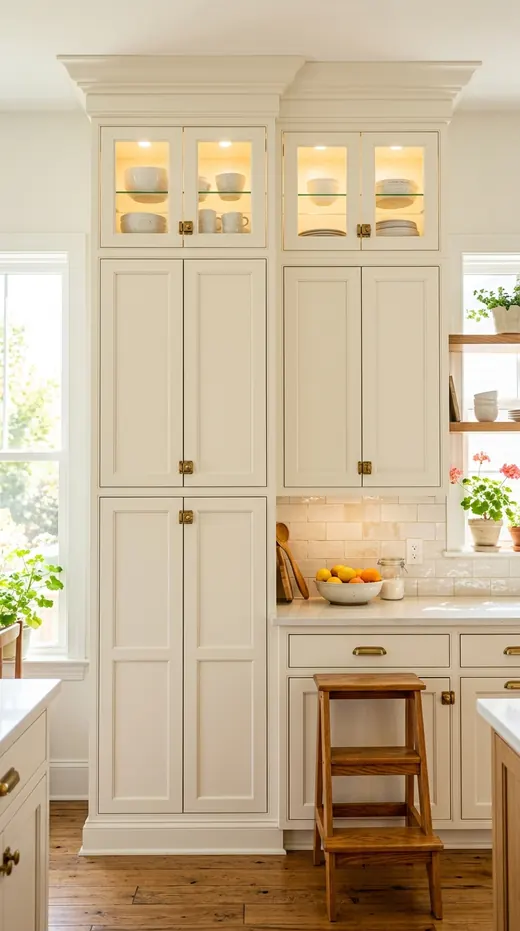
Standard upper cabinets often leave an awkward 12-inch gap below the ceiling that collects dust and grease. Extending your cabinets all the way up to the ceiling makes the room feel taller and gives you extra storage for holiday platters.
You can stack a row of small glass-front or solid cabinet boxes above your main uppers and finish the top edge with simple crown molding. Keep a foldable wooden step stool in the pantry so those top shelves stay easy to reach.
If buying taller cabinets is not in the budget, close off the gap above your existing cabinets with painted MDF riser boards and crown trim.
2. Replace Lower Cabinet Doors with Deep Pull-Out Drawers
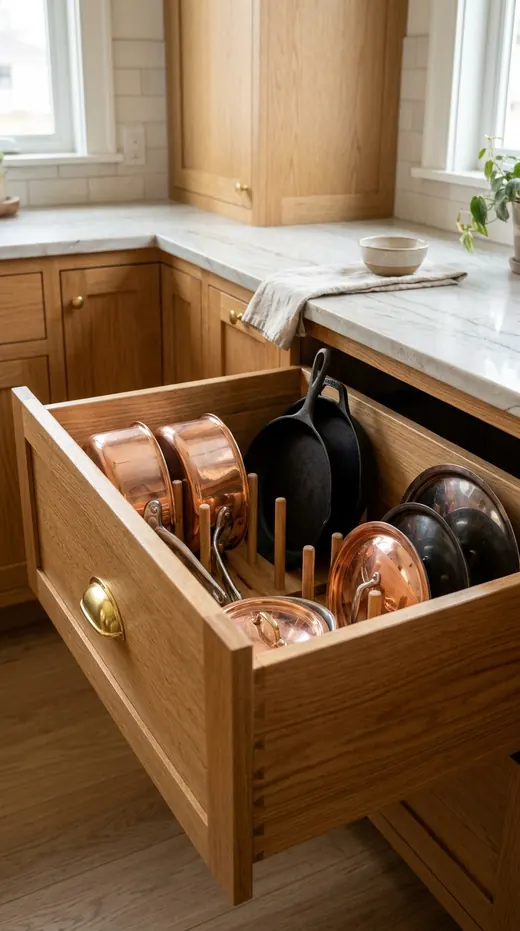
Nobody enjoys kneeling on the kitchen floor to dig a heavy Dutch oven out of the back of a dark base cabinet. Using wide, deep drawers on your lower cabinets lets you pull every pot, pan, and mixing bowl right out into the light.
Choose heavy-duty soft-close drawer slides that can hold up to 100 pounds of cookware without sagging. Use vertical pegboard dividers inside the drawers so stacks of plates and lids never slide around.
Homeowners and renters with standard base doors can install slide-out wire or wood roll-out trays inside existing cabinets using a simple screwdriver.
3. Mix Natural White Oak Lowers with Creamy Painted Uppers
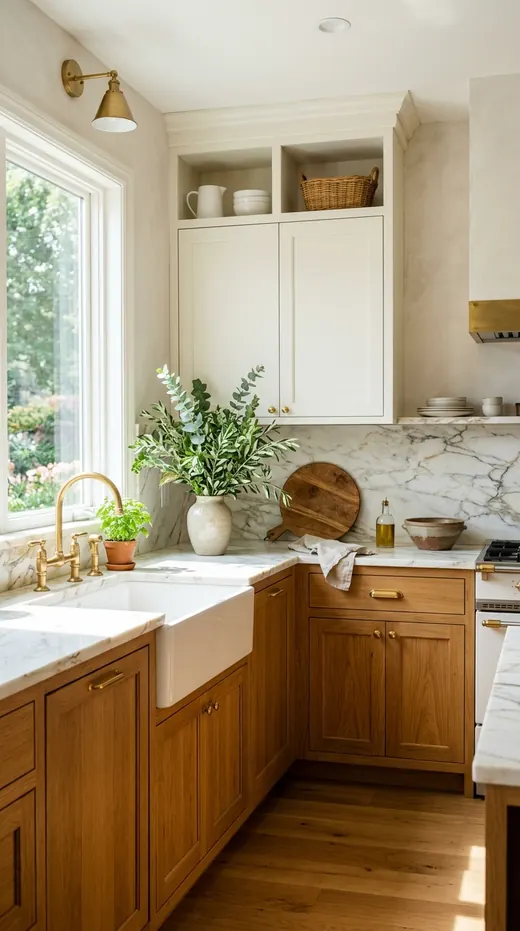
Two-tone cabinets bring warmth into a kitchen without making the walls feel heavy. Pairing natural honey white oak lower cabinets with creamy white upper cabinets grounds the floor while keeping eye level bright.
Rift-cut or quarter-sawn white oak has a straight, calm wood grain that looks neat and timeless rather than orange or knotty. Seal the wood with a clear matte water-based finish so spills wipe off easily.
For a budget makeover on older oak cabinets, keep your wood lowers, sand them lightly, and paint the uppers warm alabaster white.
4. Paint Shaker Cabinets in Muted Earthy Sage Green
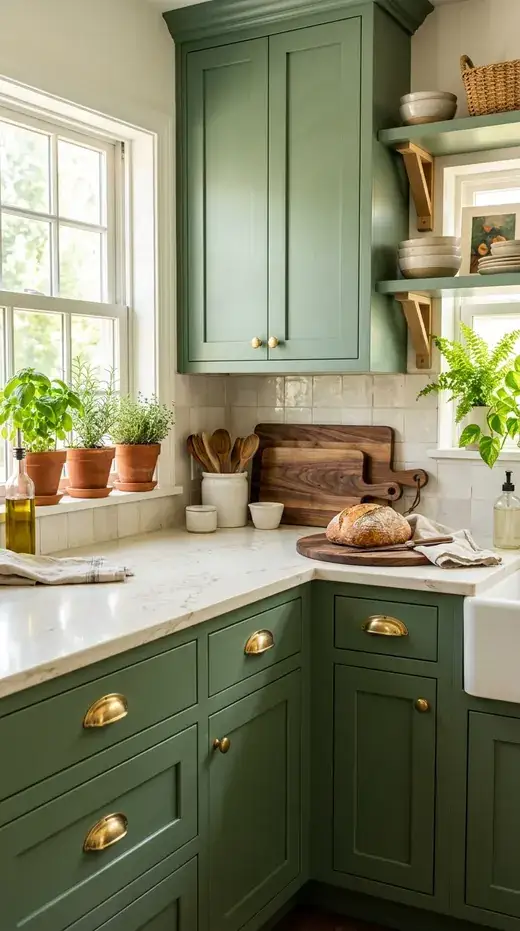
Muted sage and olive green act almost like neutrals in a kitchen because they pair so naturally with wood, stone, and brass. A soft gray-green shade calms the room and hides everyday cooking smudges better than bright white.
Pair sage green shaker cabinets with warm creamy quartz counters and unlacquered brass cup pulls. Adding a few terracotta herb pots on the windowsill makes the green paint feel fresh and welcoming.
Always test two or three green paint samples on poster board and look at them under both morning sunlight and warm evening bulbs before painting.
5. Build a Countertop Breakfast Garage with Pocket Doors
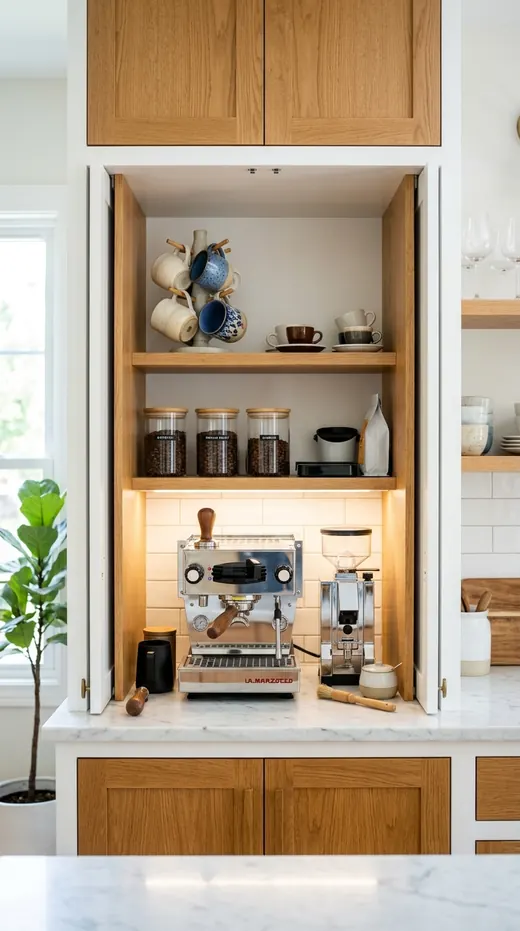
Toasters, blenders, and coffee makers quickly eat up valuable prep space and leave messy cords across your backsplash. A countertop appliance garage sits flush with your upper cabinets and hides small appliances behind doors that tuck into the sides.
Ask your electrician to install two outlets inside the back wall so you never have to move the coffee maker to use it. Add a shallow drawer right underneath to hold coffee beans, tea bags, and spoons.
In an existing kitchen, turn a lower pantry shelf into a plug-in coffee station with a power strip and a pull-out wood tray.
6. Add Fluted or Reeded Glass Inserts to Upper Doors
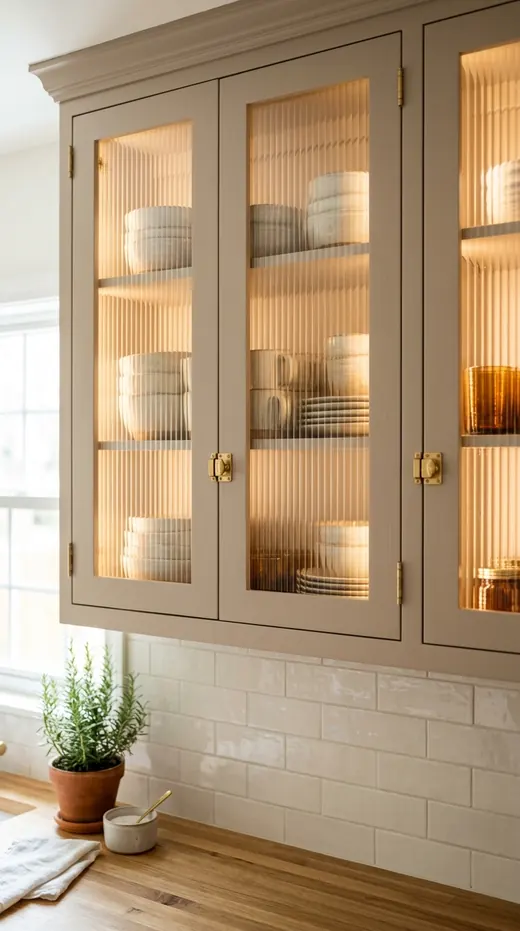
Clear glass cabinets look pretty in magazines, but they force you to keep every single mug and cereal box perfectly matched. Reeded or fluted glass panels give you the airy feel of glass while softly blurring the items inside.
The vertical glass ribs catch the light and add gentle texture across a wall of flat shaker doors. You can stack everyday colorful bowls inside without the cabinet ever looking messy.
For an easy weekend DIY project, cut peel-and-stick reeded privacy film to fit the inside of standard clear glass cabinet doors.
7. Choose Slim-Shaker Doors for a Clean, Modern Update
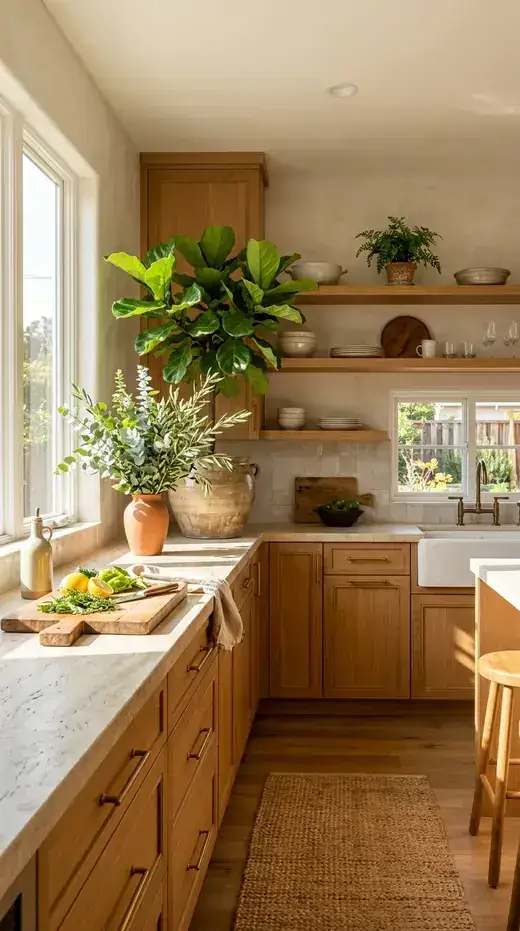
Traditional shaker doors have wide three-inch frames around the center panel, while flat slab doors can sometimes feel too plain. Slim-shaker—or micro-shaker—doors use a narrow half-inch to one-inch border that frames each door cleanly.
This thin profile looks fresh and tailored whether you choose warm painted finishes or natural wood veneer. The narrower ledge also catches less cooking dust than deep, ornate cabinet trim.
Homeowners updating flat builder-grade slab doors can glue and pin-nail thin quarter-inch lattice wood strips around the outer edges before priming and painting.
8. Install a Pull-Out Spice and Cooking Oil Rack Beside the Stove
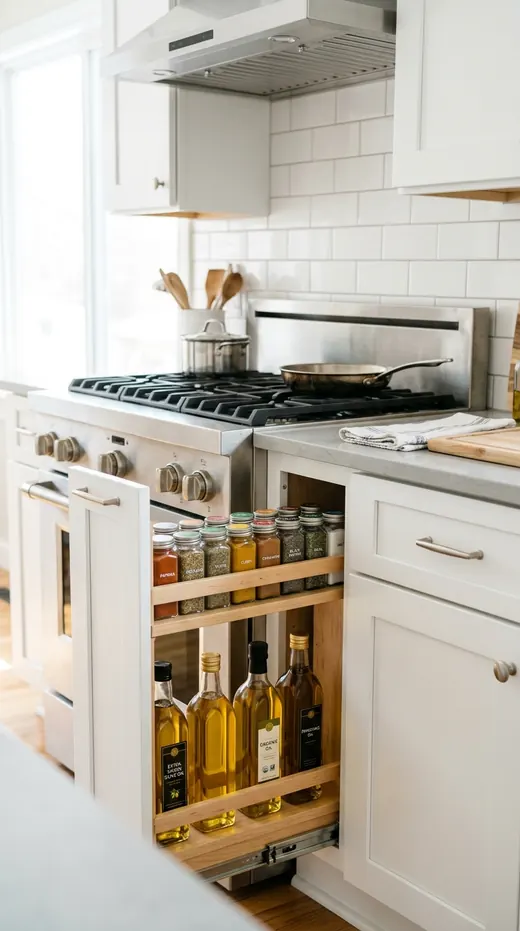
Instead of wasting a narrow six-to-nine-inch filler strip beside your stove, turn that space into a vertical pull-out cabinet. Store your olive oils, vinegars, and everyday spices right where your hand reaches while cooking.
Keep tall oil bottles on the bottom shelf and smaller spice jars on the upper tiers so every label is easy to read. Because the rack slides back into the cabinet, your bottles stay free of sticky stovetop grease.
If you cannot modify your base cabinets, mount a two-tier slide-out wooden spice organizer inside the narrowest cabinet door next to your range.
9. Warm Up Neutral Doors with Mushroom Taupe Paint
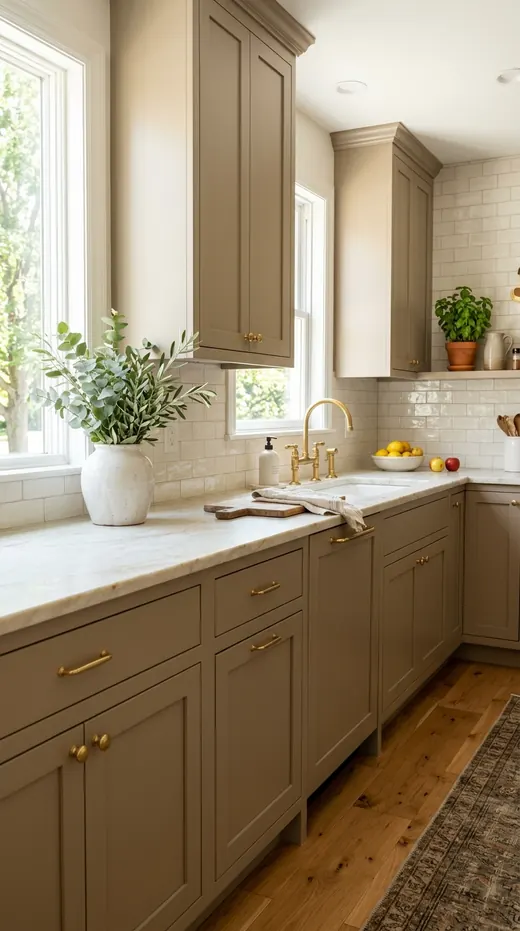
If white cabinets feel too bright and dark cabinets feel too heavy, warm mushroom taupe or putty is the ideal middle ground. Shades like Farrow & Ball Drop Cloth or Sherwin-Williams Accessible Beige wrap the kitchen in a soft, earthy tone.
Mushroom cabinets look especially cozy alongside creamy marble countertops, handmade ivory tile, and antique brass latches. The mid-tone color also hides water drips around the sink and dishwasher.
Pair taupe cabinets with warm oak floors and a woven runner rug so the neutral palette feels layered and welcoming.
10. Hide Trash and Recycling Inside a Pull-Out Base Cabinet
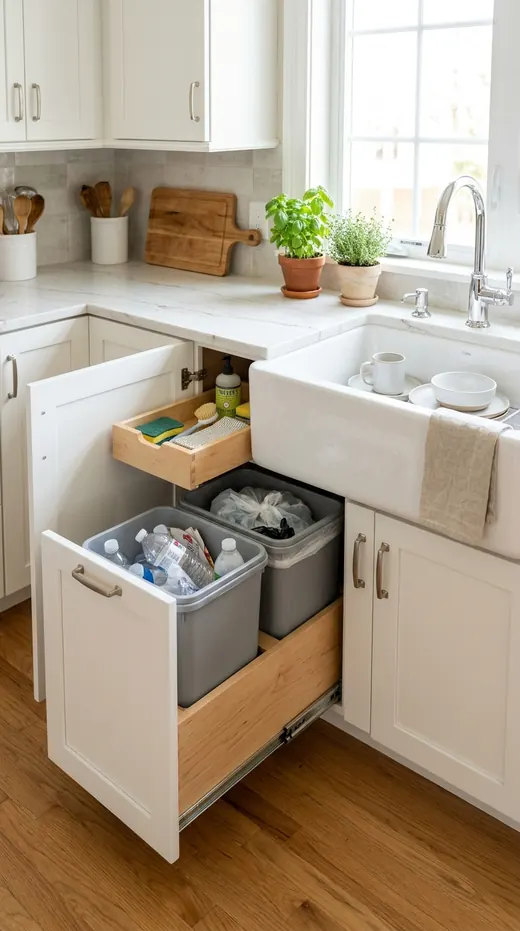
A freestanding plastic trash can sitting at the end of your kitchen island breaks up the flow of the room and collects odors. Dedicating one 18-inch lower cabinet next to the sink for a double pull-out bin hides both trash and recycling out of sight.
Look for a bottom-mounted slide frame attached to the cabinet door so you can pull it open with one hand while scraping plates. A small top drawer above the bins is the perfect spot for extra trash bags and dish sponges.
You can retrofit an existing 18-inch base cabinet in thirty minutes using a store-bought slide-out double bin kit.
11. Add Classic Beadboard Backing to Open or Glass Cabinets
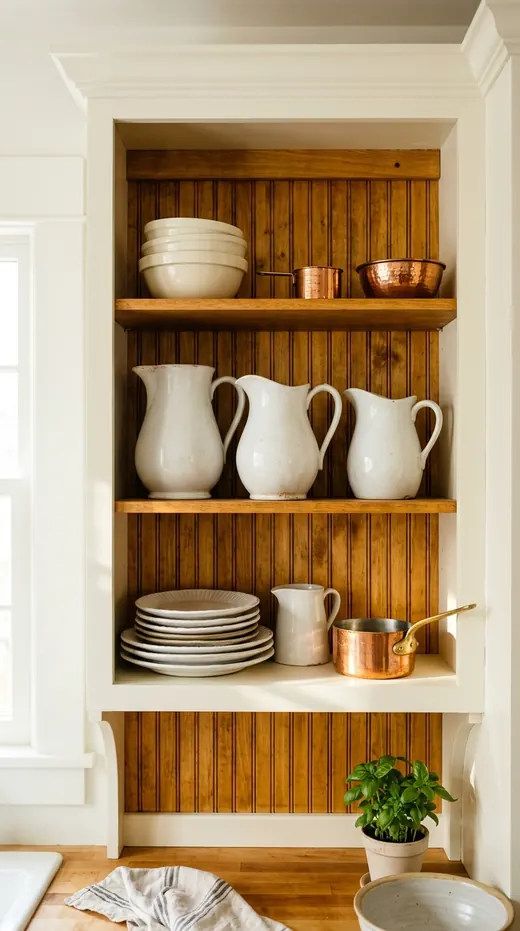
When you remove upper cabinet doors or switch to glass fronts, the plain plywood back of the cabinet box is suddenly on display. Lining the back interior wall with vertical tongue-and-groove beadboard adds instant cottage charm.
Paint the beadboard to match the cabinet frames or stain it honey wood so white dishes stand out clearly against the grooves. The vertical lines draw the eye upward and make standard shelves look custom-built.
For a fast renter-friendly fix, cut paintable textured beadboard wallpaper to fit the back of your shelves and attach it with removable double-sided tape.
12. Upgrade Hardware with Mixed Knobs, Cup Pulls, and Latches
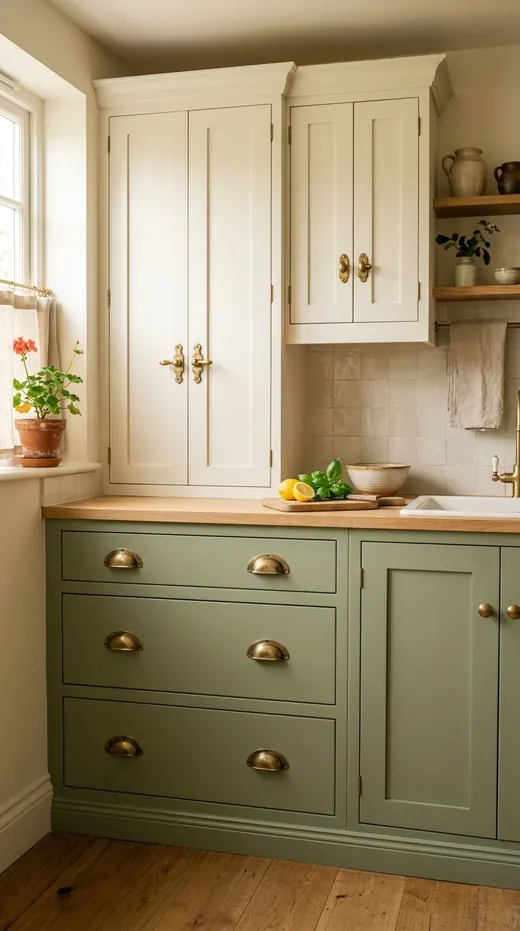
Using the exact same bar handle on every single door and drawer makes a kitchen look like a builder showroom. Mixing two or three matching hardware shapes in the same metal finish gives your cabinets a custom, collected feel.
Install comfortable half-moon cup pulls on wide drawers, simple round knobs on small doors, and classic turn latches on upper glass cabinets. Stick to one warm finish—like aged brass or oil-rubbed bronze—so the different shapes still match.
Use a cheap plastic hardware drilling template when installing new pulls so every screw hole lands in the exact same spot.
13. Turn a Dead Corner into a Kidney-Shaped Swing-Out Shelf
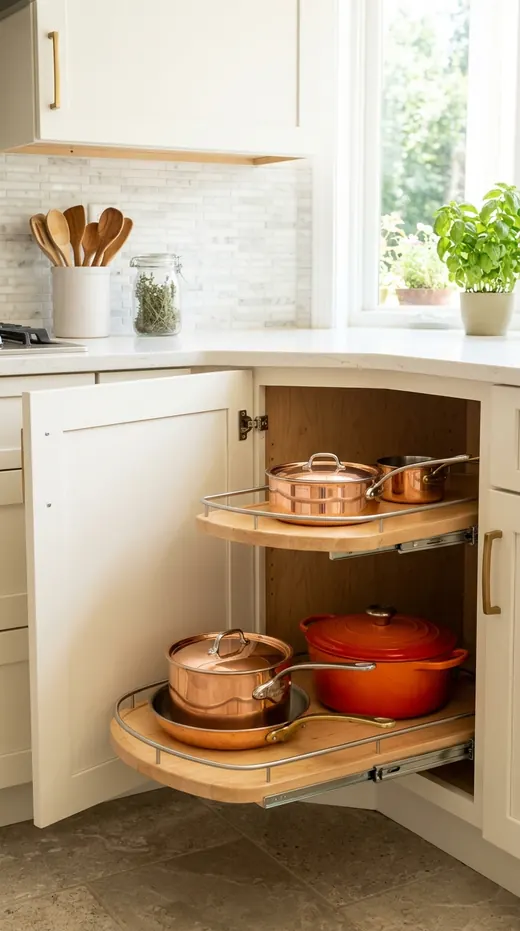
Blind corner cabinets are where baking sheets and slow cookers go to disappear forever. Installing a curved kidney-shaped swing-out shelf system—often called a LeMans pull-out—brings the entire back corner right out in front of you.
Old plastic turntables often jam when a pot lid falls off. Independent swing-out trays glide smoothly on steel arms and hold heavy mixers with ease. Non-slip mats on the tray bottoms keep pans quiet when you open the door.
Most hardware stores sell universal blind-corner swing-out kits that screw directly into standard L-shaped corner cabinets without removing the countertop.
14. Frame the Fridge and Pantry into One Built-In Cabinet Wall
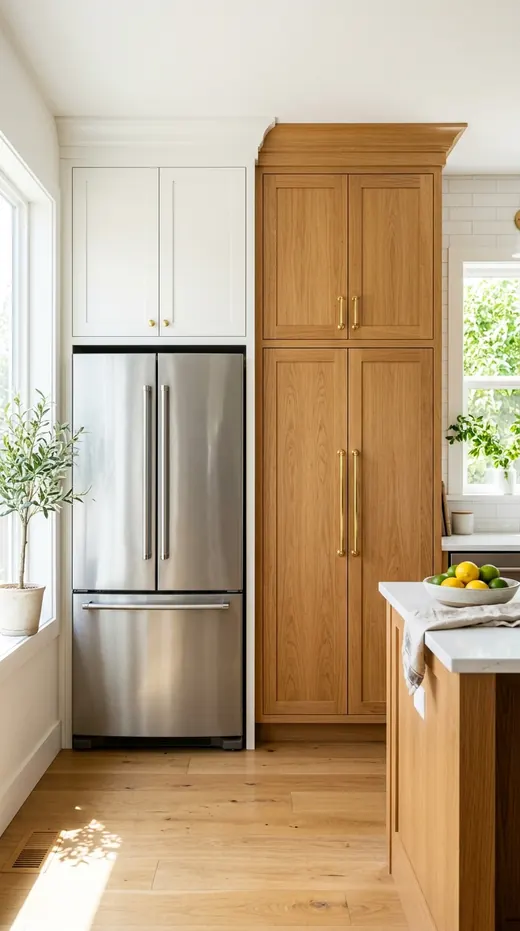
A freestanding refrigerator sticking out six inches past shallow upper cabinets can look bulky and awkward. Boxing the fridge in with full-depth 24-inch side panels, a deep cabinet above, and a tall pantry cabinet beside it creates a clean built-in wall.
The deep cabinet over the fridge is actually reachable and works great for vertical cookie-sheet dividers and cutting boards. Meanwhile, the tall floor-to-ceiling pantry next door holds a week's worth of groceries behind neat shaker doors.
Get this built-in look around your fridge by adding two wood side panels and pulling the upper cabinet forward on a 2x4 cleat.
Best Color Combinations for Kitchen Cabinets
Choosing cabinet colors that work with your counters and floors makes decorating stress-free. Use these five palettes for your kitchen cabinet ideas:
| Cabinet Style | Main Cabinet Color | Secondary / Island Color | Best Countertop Match | Hardware Finish |
|---|---|---|---|---|
| Warm Two-Tone Oak | Creamy Alabaster (#F3EFE6) | Natural White Oak (#C8A97E) | Warm White Veined Quartz (#EFECE6) | Unlacquered Brass (#B58E4C) |
| Earthy Cottage Green | Muted Sage Green (#8F9783) | Soft Linen White (#F5F0E6) | Honed Carrara Marble or Butcher Block | Antique Brass (#A88444) |
| Cozy Mushroom Putty | Mushroom Taupe (#B5A898) | Warm Walnut Wood (#6E4F3A) | Creamy Taj Mahal Quartzite (#E6DEC8) | Aged Bronze (#5C4938) |
| Classic Tuxedo Contrast | Soft Charcoal (#2F2F2E) | Swiss Coffee White (#F2EFE9) | White Calacatta Marble (#F4F1EA) | Champagne Gold (#C5A875) |
| Coastal Warm Navy | Deep Slate Navy (#2B3A4A) | Honey Oak Open Shelves (#C9A675) | Crisp Creamy Quartz (#F6F3EC) | Brushed Satin Brass (#C29B53) |
Common Mistakes vs. What to Do Instead
Planning your cabinet layout before ordering doors saves time and money. Watch out for these common mistakes:
| Cabinet Feature | Common Mistake to Avoid | What to Do Instead |
|---|---|---|
| Lower Storage | Ordering all standard lower doors with fixed half-depth shelves inside. | Choose wide, deep 3-drawer base cabinets for pots, pans, bowls, and everyday plates. |
| Ceiling Gap | Leaving a 12-inch dust-collecting gap between upper cabinets and the ceiling. | Extend upper cabinets to the ceiling or close the gap with painted riser boards and crown trim. |
| Fridge Surround | Leaving a 12-inch-deep cabinet recessed far behind the top of the refrigerator. | Pull the upper fridge cabinet forward to 24 inches deep and frame the sides with wood panels. |
| Cabinet Paint Prep | Painting over glossy wood cabinets without degreasing, sanding, or bonding primer. | Scrub doors with degreaser, scuff-sand, apply shellac or bonding primer, and use cabinet enamel. |
| Lighting Inside | Installing dark upper cabinets with no under-cabinet task lighting below them. | Add 2700K LED strip lighting under all upper cabinets so your prep counters stay bright. |
Budget-Friendly Decorating Tips
- Install roll-out wood trays in lower cabinets: You can get the convenience of deep drawers for a fraction of the price by screwing slide-out wood trays onto existing base shelves.
- Swap builder-grade knobs for cup pulls and latches: Updating your cabinet hardware takes less than an hour with a screwdriver and completely changes the look of plain doors.
- Line glass doors with reeded privacy film: A ten-dollar roll of fluted window film hides mismatched dishes inside glass-front cabinets while adding custom texture.
- Use vertical dividers over the fridge: Screw wire or plywood baking-sheet dividers into the cabinet above your refrigerator to organize muffin tins, cutting boards, and cooling racks.
Frequently Asked Questions
Are deep drawers really better than lower cabinet doors?
Yes, deep drawers are much easier on your back and knees because the entire shelf slides out to meet you. You can see every pot, lid, and food container from above instead of reaching into a dark corner.
What is the most timeless kitchen cabinet door style?
Classic shaker and slim-shaker doors are the most versatile and long-lasting styles. Their clean rectangular frames work equally well in modern, farmhouse, cottage, and traditional homes.
Can I paint my existing oak cabinets without the wood grain showing through?
Yes, if you fill the open oak grain first using a water-based wood grain filler before priming. After sanding smooth and applying two coats of bonding primer and urethane alkyd cabinet enamel, the doors will look smooth like factory-painted wood.
How high above the countertop should upper cabinets be hung?
The standard distance between your countertop and the bottom of your upper cabinets is 18 inches. If you have tall ceilings or tall appliances, raising the uppers to 20 inches gives your counters a much more open feel.
Conclusion
The best kitchen cabinet ideas make daily cooking easier while bringing warmth and character into your home. Add deep pull-out drawers, extend your uppers to the ceiling, or refresh your doors with sage green paint and brass hardware. Thoughtful cabinet upgrades pay off every single time you step into the kitchen.
For more room-by-room inspiration, explore our guides on white kitchen design ideas, black and white kitchen design ideas, and small cozy kitchen ideas.